Pages

Showing posts with label DIY. Show all posts

Friday, March 16, 2012

Easter Lollipop Garden

My cousin wanted me to share this nifty little Easter idea with the masses. It's been a hit the two years we've done it with N, and I'm so excited now that D is going to be old enough to kind of get it. I got the idea from my boss at work a few years ago, and he got it from one of his customers. Kind of like pinterest in the dark ages, haha!

Did you know that on Easter Eve, you can plant jelly beans and they grow overnight into lollipops?

The day before Easter, find a nice spot to plant your jelly beans.

Make sure they're covered up well with dirt!
Easter morning arrives and voila! Lollipops have sprouted!
Make sure you get them all!

This was from 2010, the first year we did the Lollipop Garden. N was just over 2 and FLIPPED over it, she was so excited!

Sunday, February 19, 2012

Pinterest: Productive or Procrastination?

I like to think of it as productive procrastination. If you don't know what Pinterest is (and it seems that the ignorant population is rapidly decreasing as the popularity of Pinterest has boomed in the past few months) I'll give you a brief rundown.

The best way I can think to describe Pinterest is that it's a visual organization of internet bookmarks. Some bookmarks, or pins, you create yourself. You can also search or browse through other people's pins by general category, such as DIY & Crafts, Food & Drink, Kids, Pets, Art... etc. When you run across someone else's pin (internet bookmark) that you like, you can "re-pin" it to your own page. Your personal page is divided into categories called "boards" that you create yourself. On my personal page I mainly pin to my crochet board and crafts for my kids board. I love this method of storing and organizing internet bookmarks. Previously I would bookmark a site from my internet browser, and then promptly forget about it, or forget what it was when I went back. If you want to create your own "pin", there's instructions on how to add the "pin it" button to your internet's bookmarks or favorites tab. While you're on the website, click your "pin it" button and select a thumbnail to display on your board. Add a caption describing the website or why you pinned it and select a board to display it on. Voila! Limitless inspiration at your fingertips.

The key is to not only pin every awesome idea you run across, but to actually FOLLOW THROUGH with them. I've been making a concerted effort to do more with my girls. I want to do more than get through the day, I want to have a fun day. The little crafts and play time ideas that I've run across through Pinterest have made this so much easier. Once I got into the habit of doing more, it wasn't such a chore when N wanted to pull out her watercolors or play doh.

Here's a few of the pins that I have completed!

 Cloud Dough from Play at Home Mom

Metamucil Flubber from about.com

Water Beads. These are actually squares in progress (we did both), but everything was squishy, slippery fun!

We put everything on the lightbox thanks to Play at Home Mom (again!)

Cute dress up butterfly wings adapted from My Poppet

It's not snot, it's home made hand soap!

8 complete crock pot meals, I'm so excited about this one!! I'm actually making my first one tomorrow morning. Yum! I especially love these recipes because they are heavy on the veggies, and super low fat.

I swear I do fun things with little D, too, but she's not as easy to photograph, haha! That girl doesn't stop moving, and if she sees the camera, she wants it. Bad. Anyway, I've been making it a point to accomplish more awesome with the wee ones, and Pinterest has been a good inspiration. A lot of the activities I've found use things that I already have around the house. Super handy!

I realized last week that my first blog was February 17th last year. Happy Birthday, Blog! I think I'll take the next few days to evaluate where I am and what I've accomplished during the last year. My head is definitely in a better place now than a year ago, and for that I'm glad. The girls are growing up (*sniff* *sniff*) and every day gets easier. I'm glad for everyone's support and all that mush, but I think I'll get into that next post. ;)

Thursday, February 16, 2012

Valen-times Day

We had a nice one!

The day before, we made faux sugar cookies out of boxed white cake mix, neon food dye and red sprinkles. N was a big help rolling out the balls of dough and squishing them flat. Of course, she also helped enthusiastically decorate the tops! I cut a heart out of cardstock and used the hole to create the hearts.

While the cookies were baking, N made the Valentines Day cards for her pre-school class. I folded the paper and drew a half heart and N did the rest. She cut the hearts out all by herself...

and really got into decorating them! I thought she would just stamp random hearts on them, but after a few she created a design that she liked and made the rest the same. The row of hearts at the top with a small break in the middle are eyes, and she drew smiles and frowns on the bottom. (That girl LOVES a good sad face!) We talked about love, and why she loves her friends and family.

She instructed me to take a picture of her stamps after she lined them all up.


Here are the finished Valentines. Cute! I made little bags of Mini Teddy Grahams to go on the back. I was going to write something about "bear hugs" or something, but N got so into her designs, I didn't have room! In the back is a rice hand warmer for her teacher.

The next morning, she let me make her hair pretty for school. It was supposed to be a heart, but I think I pulled a little too much hair back. Still cute, though. She had so much fun at school exchanging Valentines. I should have done something special with D, but sometimes that girl exhausts me! We went to a playdate with her cousin, so she had a super fun morning, too.

I hope everyone had a nice Valentine's Day. We should take time every day to remember those we love!

Friday, January 6, 2012

Little Girl's Sweater Dress Tutorial

A few months ago, I ran across a tutorial for a toddler's sweater dress here, at Smashed Peas and Carrots. This chick has a fabulous blog with lots of fun DIYs for the kids! When I decided to make a few for N, I discovered that I could simplify it by several steps and make a larger dress for a pre-schooler. It would also work as a tunic size for older kids.


I started with a goofy short sleeved sweater that I would never wear and found a dress that fit N well.


 Trim sweater on the sides, leaving 1/2" seam allowance.


Trim down arms to a little girl width. I left mine wider, so I didn't measure, but you can lay the dress' sleeves on top to get a measurement for the width and length. Since the sweater I used was short sleeved, I didn't have to worry about length. Make sure you follow the line of the original sleeve, rather than cut it off square.


Choose a stretchy stitch on your sewing machine. I have a Husqvarna Emerald, and it has a "stretchy" setting, so I used that. A simple zig zag stitch would work just fine, though.


Fold the sleeves so that they're inside out and pin the seam. When sewing, be sure to leave 1/2" unsewn at the armpit side to attach to the dress!


Turn the body of your sweater inside out and attach your arms. There are two ways to pin the arms on. You can leave them inside out and pin to the dress like Smashed Peas and Carrots did, or you can turn them right side out and lay them inside the dress to sew. I decided to try the latter this time, and I thought it worked out really well. I tried to take a good picture to illustrate what I did. Basically I lined up the edge of the arm with the edge of the dress and pinned from the inside of the arm.


It seemed a little less awkward for me to sew it this way, but either way works just fine. Start at the armpit and sew up, over the shoulder, and then back down to the armpit, rotating the sweater as you go.


Ta-daa! This is the finished arm and unfinished side seam. To sew the side seams, leave the dress inside out, pin the sides secure and just sew from armpit to the bottom hem! I always have a little hole in the armpits where the seams don't meet completely which I hand sew up with just a few stitches.


Here's a shot of the finished dress! I've found that sweaters are very forgiving, so you don't have to be too exact. I'm not a very good sewer, so I leave a wide seam allowance and then I go back to trim it up. Definitely give the original tutorial a look if anything's confusing.


N loved it and wore it to school the next day.


Haha, I can NOT get a serious picture out of this girl!


Nice and stretchy to play in.


OK, all done. Can we go outside?!


Friday, November 25, 2011

Thanksgiving & Craft Reveal!

I hope everyone had a fabulous Thanksgiving, I know I did! We hosted the day at our house, same as the last 2 years. My turkey turned out perfect, I'm happy to say. I only make it once a year, so I tend to forget what I did the year previous. I need to stop reinventing the wheel and just write it down or something. In addition to the turkey, I made stuffing (of course!), deviled eggs, spinach Parmesan dip, cranberry sauce, croissants with pumpkin butter, and rice pudding. With the dishes that everyone else brought, we had quite a spread. I didn't get very many pictures since I was so busy hostessing and running after the girls. The stamps that I made last week made a cameo at the table:


I think they turned out really nice! We also made the traditional turkey handprint and I tried to make a cornucopia out of D's foot. I think it would have looked more like a cornucopia if I had painted her toes different colors. Still cute, though!


Hopefully in the next week or two, I'll have time to feature the sweater dress tutorial I found. I hope everyone made it through Black Friday alive! We hermited in the house and didn't go anywhere. Perfect day for me ;)

Wednesday, November 16, 2011

Craft: Home Made Stamps!

So this is my first attempt at a tutorial-type post. I'm making Thanksgiving place cards with the kids (probably just N) later this week and I didn't have any fall themed stamps. I had a mini-epiphany on how to make my own (it's so easy that I'm sure there's an identical tutorial out there somewhere) with stuff I already had.

You Will Need:

Puffy Paint or Glue Gun
Adhesive Backed Foam Sheets
Flat Glass, Mirror or Ceramic Surface
Washable Marker
Scissors

 I'm terrible at writing backwards, so I used the back of a plate to lay out my text.
 Press the foam sheet to the marker before it has a chance to dry.
 Ta-daa!
 I did one word at a time so that it didn't dry.
 These words were a little small for the puffy paint, but I wanted them to leave room for N's decorations on the place cards.
 These will take about 24 hours to dry, so plan ahead!
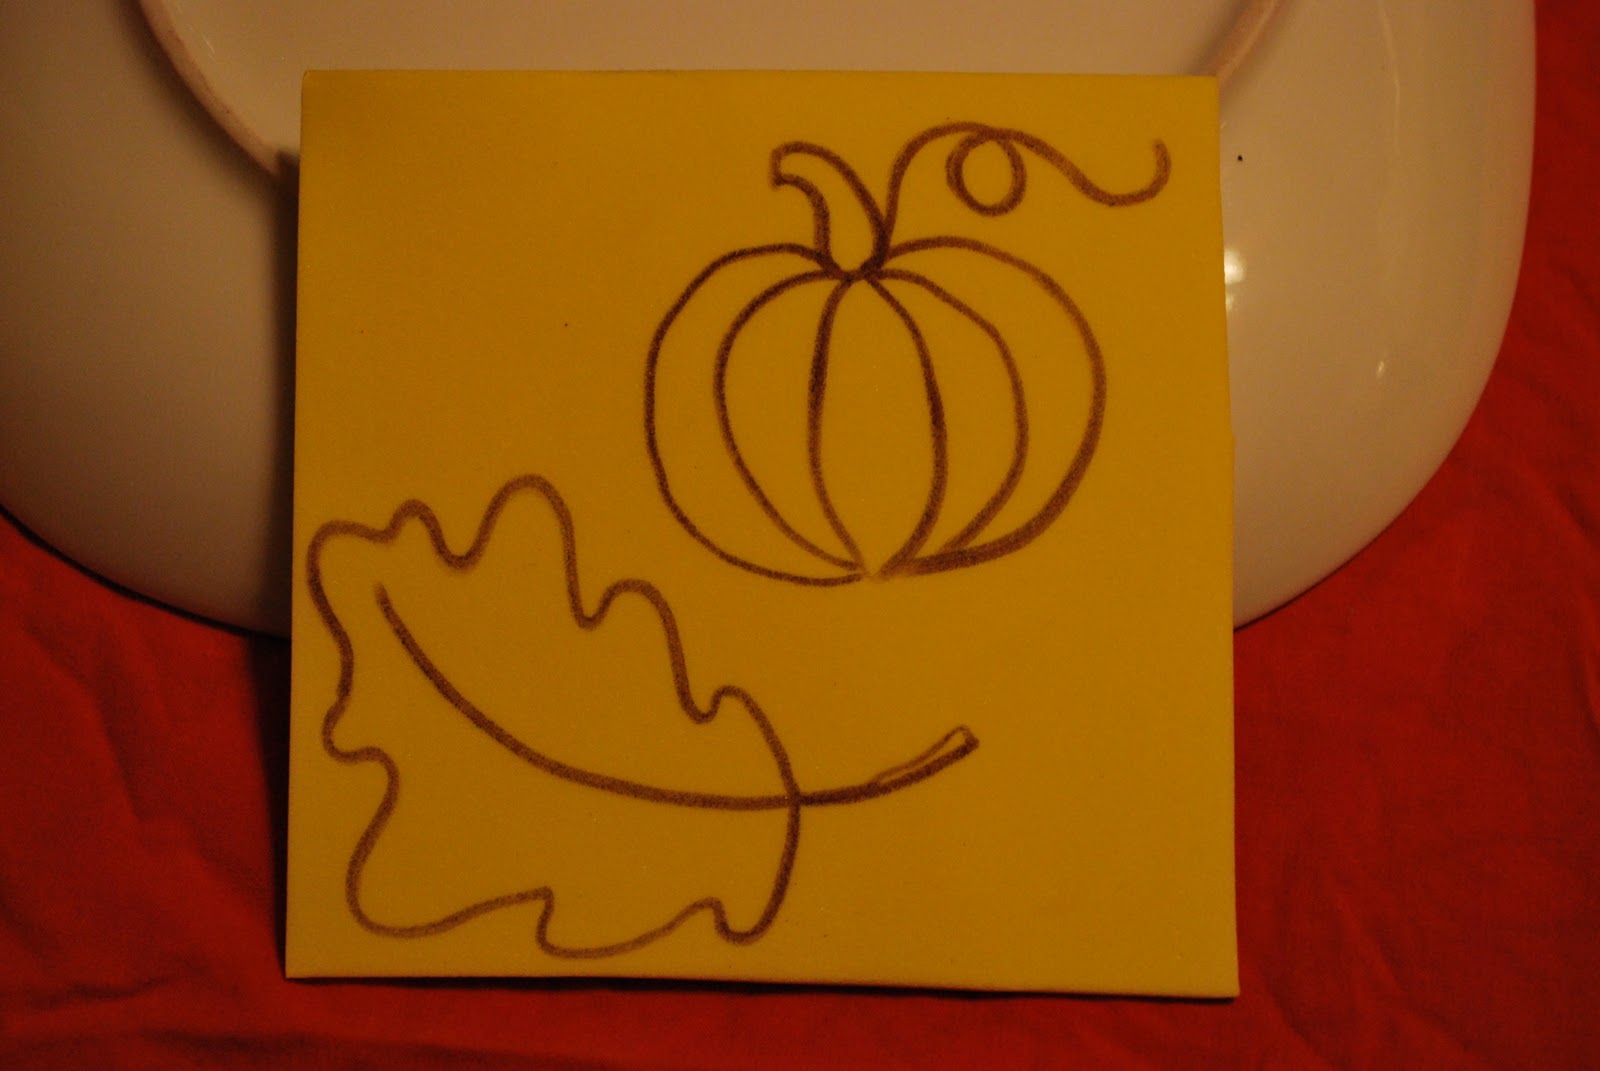
 For the decoration stamps, I just freehanded some fall-themed pictures directly onto the foam.
 If you need a stamp RIGHT AWAY you can also use a glue gun. It's not as smooth as the puffy paint and the lines are thicker, but it dries in just a few minutes.
 Pilgrim hat!
 Here they all are :)

After they dry, I'll trim them a little closer and adhere them to... something. Maybe I'll get A to cut me wooden blocks. Those small cardboard disposable jewelry boxes would also work well. We'll be using sponges to apply poster paint to the stamps in a few days. I'll update with the finished product in a few days!

Monday, November 14, 2011

Postception?

I know a post promising that I'm going to post a post is a little redundant, but maybe if I put it out there it will actually get done.

I think I want to redesign a *little* to include a crafty section for my blog. It will give me something positive to write about as well as motivate me to craft more and document what I'm making. Coming soon... sweater dress, bear ears, home made stamps, ummmm... maybe a hat or two? Most of these won't be tutorials since what I'm making was picked up from another blog or website, but I'll link back to my source so that y'all can try it out if you want.


I'm excited, how 'bout you?!

Wednesday, May 4, 2011

Rainy Day? Craft Away! (Updated)

I'm always looking for something easy, cheap, quick, fun and not too messy to do with N. A tall order! I ran across a neat website called HowDoesShe? that has lots of craft ideas as well as recipes and articles on mommy-type stuff. I've found a few nifty things on there so far. One of the crafts that I ran across was this sidewalk chalk recipe. It looked easy, and N had a birthday party to go to soon and I thought it would make a good gift. I did end up modifying the "recipe" a little to make it less messy and easier to clean up.

You will need:

2/3 cup water
1 to 1 1/4 cups plaster of paris
sandwich sized ziploc baggie
ice cube tray or silicone candy mold tray
scissors
food dye
toddler or pre-schooler


1) Pour water into zip loc baggie and add food dye.
2) Add about half of the plaster of paris and seal baggie with most of the air pressed out.
3) Give to wee one to squish around until the plaster is thorougly mixed in.


4) At this point, the mixture will be very watery. Add more plaster until it is about the consistency of pancake batter. The pink set used a little over 1 cup of plaster and the yellow used about 1 1/4 cups. You can see the difference in how thick the mixture is. Both set up fine.

UPDATE: After popping out the chalk, the thinner mixture turned out much better. The chalk had no bubbles in it and the tops were smoother. I really like the home made chalk better than the cheap store bought chalk becuase it's much denser, so it lasts longer. The store bought chalk looks like it's made from a frothy mixture, so there's lots of air bubbles in it. Nothing wrong with it, but goes quickly. I need to get some more interesting molds, though! Also, the chalk only really works on sidewalks. It doesn't work very well on an indoor blackboard.


5) When you have the mixture at the thickness you want, snip a corner off the baggie and fill your trays.
6) After a few hours (or a nap!) flip ice cube trays upside down and pop out your chalk!


Here's the set I made for Z's 3rd birthday party. I got the boxes and basket at Rite Aid, and N decorated them with princess stickers.

The best thing about my modifications to the original recipe is that there's MINIMAL CLEANUP!! Just toss the baggies, wash the mold and you're done. I also like the small sized batches, this lets N pick lots of colors and squish lots of baggies. Her squishing made me a little nervous, so I'm definitely going to invest in some name brand baggies. The ones I had were from the dollar store and I didn't have a whole lot of faith in them holding up to her enthusiastic participation.

We had lots of fun today, even though it was rainy and chilly out. Now I just need to find something good for next time...

Thursday, April 28, 2011

Stickers, Stickers Everywhere!

It's funny how much a small change can make such a big impact on such a young mind.

A few months ago, I was at my wit's end with N. My anxiety level was at an all time high, she had screaming temper tantrums several times a day and I cried at least once a day from anger and frustration. We've been going through a lot of big family changes, which I've touched on before. The biggest is A's schedule. Before he got the wonderful opportunity to teach, he gave the girls a bath and put them to bed every night. It was their daddy time. Right now, he's in school and working more hours in the hopes that he can teach full time in the future. I think this has impacted N the most. Don't get me wrong, I miss him, too, but at least I can rationalize and understand what's going on. N's little brain just went haywire, I think. The tiniest obstacle would result in yelling, crying and throwing whatever she could get her hands on. Time outs were marginally effective. They were better at calming her down after the fact than preventing one to begin with. At her worst, she was going ballistic more than once an hour. And so was I.

To vent a little of the steam, I posted up on facebook and got many helpful tips from my friends. One was that I should do something to reward and reinforce good behavior. They suggested a chart that she could put a sticker on when she did something good, then trade it in at the end of the week for special "daddy time." The very first day we instituted it, I felt like she was calmer. It wasn't like she was trying to be good, but maybe that I noticed the good things she did more often and praised her for them. I couldn't think of a good name for it, so I just called it the Be Good Chart, haha! The chart was definitely therapeutic for her AND me. It's hard to get through the day when the moments that stick in your mind are all the crappy ones. I knew I would never remember everything that she did, so I would put a sticker on and then write one line at the bottom about how she was good. I tried to get her to tell me what she did, like "shared toys with D" or "left the park without a fit." Lately I've been heading off tantrums with a reminder that if she gets ready for bed quickly without a fuss, we can put a sticker on the chart.


N is so proud of her chart, she shows it off whenever she can. Just last week, Aunt C came to see N (and incidentally stay later after N & D went to bed for drinks and crocheting) and one of the first things N said was "Come look at my Be Good chart!!" I think a lot of the change in the household attitude is stemming from focusing on the positive. A comes home and asks how the day went and I can tell him all the nice things N did, instead of how many hissy fits she had.

I also wanted to post about N's visit to pre-school, a few of our crafts and D's scary trip to the ER, but it's really late. Everyone probably already heard through Facebook, but D spent the day at the ER with pneumonia. No fun! She's all better now, so I guess there isn't really anything to post about. We've been blessed thus far in that we've never had any serious health problems with our children. This was the first time anyone has been seriously ill and one of only a handful of times we've ever even taken them to the doc's for being sick. N went for an earache once, and D went when she had Fifth Disease and went for her diarrhea, but that's it. Like I said, we've been lucky!

I'll try to get back soon for the rest of the updates, but until then... Be Good!!